Today I made 2 more Christmas cards. These took me all day, so not as quick and easy as the last group of cards but I enjoyed colouring these cute images.

I just received this cute stamp from Whiff of Joy “Elf Maya & Kitty writing Santa’s list” yesterday and I was excited to try it out asap.

I still have a few more cards to make and I think they will be finished tomorrow. The next run of cards are quick and easy, or at least I hope they will be.
Seeing this cute image reminded me to show you a couple of super cute photos of my dear old mum and my grandson, her great-grandson, taken earlier this week.

Both had just eaten part of mum’s Christmas present, chocolates, and were looking quite pleased with themselves.

Mum was busy opening her chocolates and ggs got the next best job of opening the card.
I’ll be back soon with more Christmas cards and family photos.
Bye for now,

Can you believe that it is just over a week until Christmas??? I have just realized that I still have quite a few Christmas cards to make so they had better be quick and easy.
Here is what I came up with for the first card on the production line –

A very easy process. I stamped the Hero Arts wreath with red ink onto the kraft panel. I let that dry and then I stamped the wreath again but this time with VersaMark ink and heat embossed it with white embossing powder overlapping the images. I attached a strip of red card to the bottom of the kraft panel and then attached the “merry Christmas” banner with some foam tape. I slipped the sprig of holy under the banner using some tacky glue. Lastly I added some red and white pearls to the wreath adding to the candy cane effect.

I made 3 of these in less than 1/2 hour and I’m very pleased with that considering I should have them posted by now.
I’ll be back over the next couple of days with more photos.
Bye for now,
Over the last week I’d been having fun looking at YouTube videos and blogs about creating backgrounds. There are some terrific ideas out their in blogland. I wanted to make a few more tags to add to our Christmas presents and thought I would use some of the ideas I had found. Talk about coincidence, I looked at the Some Odd Girl Blog to see if I had any luck in last month’s challenge (no I hadn’t 😦 ) but I noticed that the challenge was to create your own background. Well I have the tags finished now and will enter the challenge.

All of the tags were die cut from white card stock. This tag I coloured by rubbing Ranger Distress Inks over the card with the applicator. I used “faded jeans” and “broken china”. Next I misted the tag with water to make a dappled effect. I then added some “star dust” Stickles and hopefully they look like snowflakes. I die-cut some Memory Box Christmas tress and a hill from “snow” card. I coloured the sweet stamp from Some Odd Girl “Snow Bunny” stamp with Copics and fussy cut it. The last step was to heat emboss the sentiment in black.

I heat embossed some snowflakes on the white card with a sparkly embossing powder, then I once again coloured this tag by rubbing Distress Inks over the card, “spun sugar” and “tattered rose”. I coloured the sweet stamp from Some Odd Girl “Holideer” stamp with Copics and fussy cut it.

I used two Distress Ink colours, “wild honey” and “shabby shutters” on this tag. First using the applicator I added “shabby shutters” then applied a flourish swirl over the tag and applied wild honey. Next I covered the tag with ds tape, removed the top off the tape and sprinkled clear glitter over the top. I coloured the sweet stamp from Some Odd Girl “Partridge” stamp with Copics and fussy cut it.

I covered the final tag with washi tape. If you look closely you will see that I’ve attached it diagonally. I coloured the sweet stamp from Some Odd Girl “Chris Mouse” stamp with Copics and fussy cut it.
Well these tags were fun!

Bye for now,
Happy Birthday to my little grand-daughter. She is 2 today. The invitation card had butterflies on it so I thought my card should have butterflies as well.

The sweet butterfly is a stamp from Magnolia. I’ve coloured it with Copics and added plenty of glitter because most little girls love glitter – I still do even though I’m far from little anymore. 🙂

If you follow my blog you might know that I love to make wobbly cards for children and yes, this card is no exception. I’ve made a little spring by wrapping craft wire around a pen and then attaching the spring to the back of the butterfly and to the card. I love it and I hope dgd does also and I hope it wobbles for a little while before she gets a bit too rough with it 😆

I’ll show you the card from the side and hopefully you get a bit of an idea of the spacing.

The card has been ready for a few days but I haven’t wanted to post it until now so that it will be a surprise. Today is supposed to be a beautiful day weather-wise and that always makes it easier to entertain littlies, so let’s cross our fingers that the ‘weather forecaster” is correct this time.
Bye for now,
Generally I’m not much of a “garage sale” fan. My husband is and I just tag along, but at a recent sale I was a keen participant. I found some plain little candle holders for $1 – bargain.

Here they are after I have tizzied them up a little. All I did was add some white and silver ribbons and a buckle.

I added some battery operated tea-lights and they fitted perfectly.

All in all I was very pleased with them and I think they will be a pretty addition for Christmas.
At the same garage sale I found 3 small raw photo frames for $5 – another bargain. You will probably see them in a blog post after Christmas.
Bye for now,
It’s starting to feel a lot like Christmas. The streets are getting busier and the shops have cranked up a notch. The only thing is the weather, it is cold and wet. We’ve hardly had any spring weather! UGH! I know in the northern hemisphere you expect cold and wet at this time of the year but down here it should be warm and sunny. Nevermind, I’m sure we will get our share of heat soon.
Onto more crafty news. At our crafty get-together we shared some stickers. I’m not a great fan of stickers usually but these were so pretty (and cheap :)) that I wanted to see what I could make with them. Here is my first idea –

A white and silver tag. I cut an oblong for the tag and used a corner of a spellbinders die to make a fancy top.

I lifted the top layers with ds foam tape to give the tag the illusion of depth. The lower layer was run through a snowflake embossing folder.

I really need to start concentrating on making Christmas cards and tags. At the moment I have only 2 Christmas cards made and this is my third tag. Oh dear – many more needed! So you will start to see my Christmasy projects starting soon.
Bye for now,
Another crafty day done and dusted. I still over estimated how many projects we could get through in 3 hours, never mind the projects we didn’t get time for can be made at home (I hope).
I have shown you some of the projects we were to make and here is another –

As you can see it is an easel card/post it note holder.

This was the last project we finished on Saturday. After this card every one was exhausted and ready to go home.

Notice how it closes really flat for posting or packaging.
I think we all enjoyed the day and it was a great day to be inside because we are still having cold and wet weather.
Here are the lovely crafty ladies (some of our regulars couldn’t make it on the day and I’m sorry they missed the photo opportunity).


The projects we did finish were, 2 envelope gift bags, fancy tags, tic tac cover and easel/post-it note card. The crafters now have some homework 🙂 of Santa tag and stocking gift card holder. Thanks for your participation this year crafters and look forward to seeing everyone again in the New Year (perhaps February).
Bye for now,
Today’s Christmas tags are totally inspired by Linda Duke. Linda has a beautiful blog where she shares her wonderfully artistic work. Pop over and have a look. My tags are a very modest attempt at producing tags like Linda.
Here are mine –


I have simply stamped “to and from” on the back.
Hope you enjoyed taking a look at the tags, I really loved making them, so much fun to make something outside my usual style.
Bye for now,
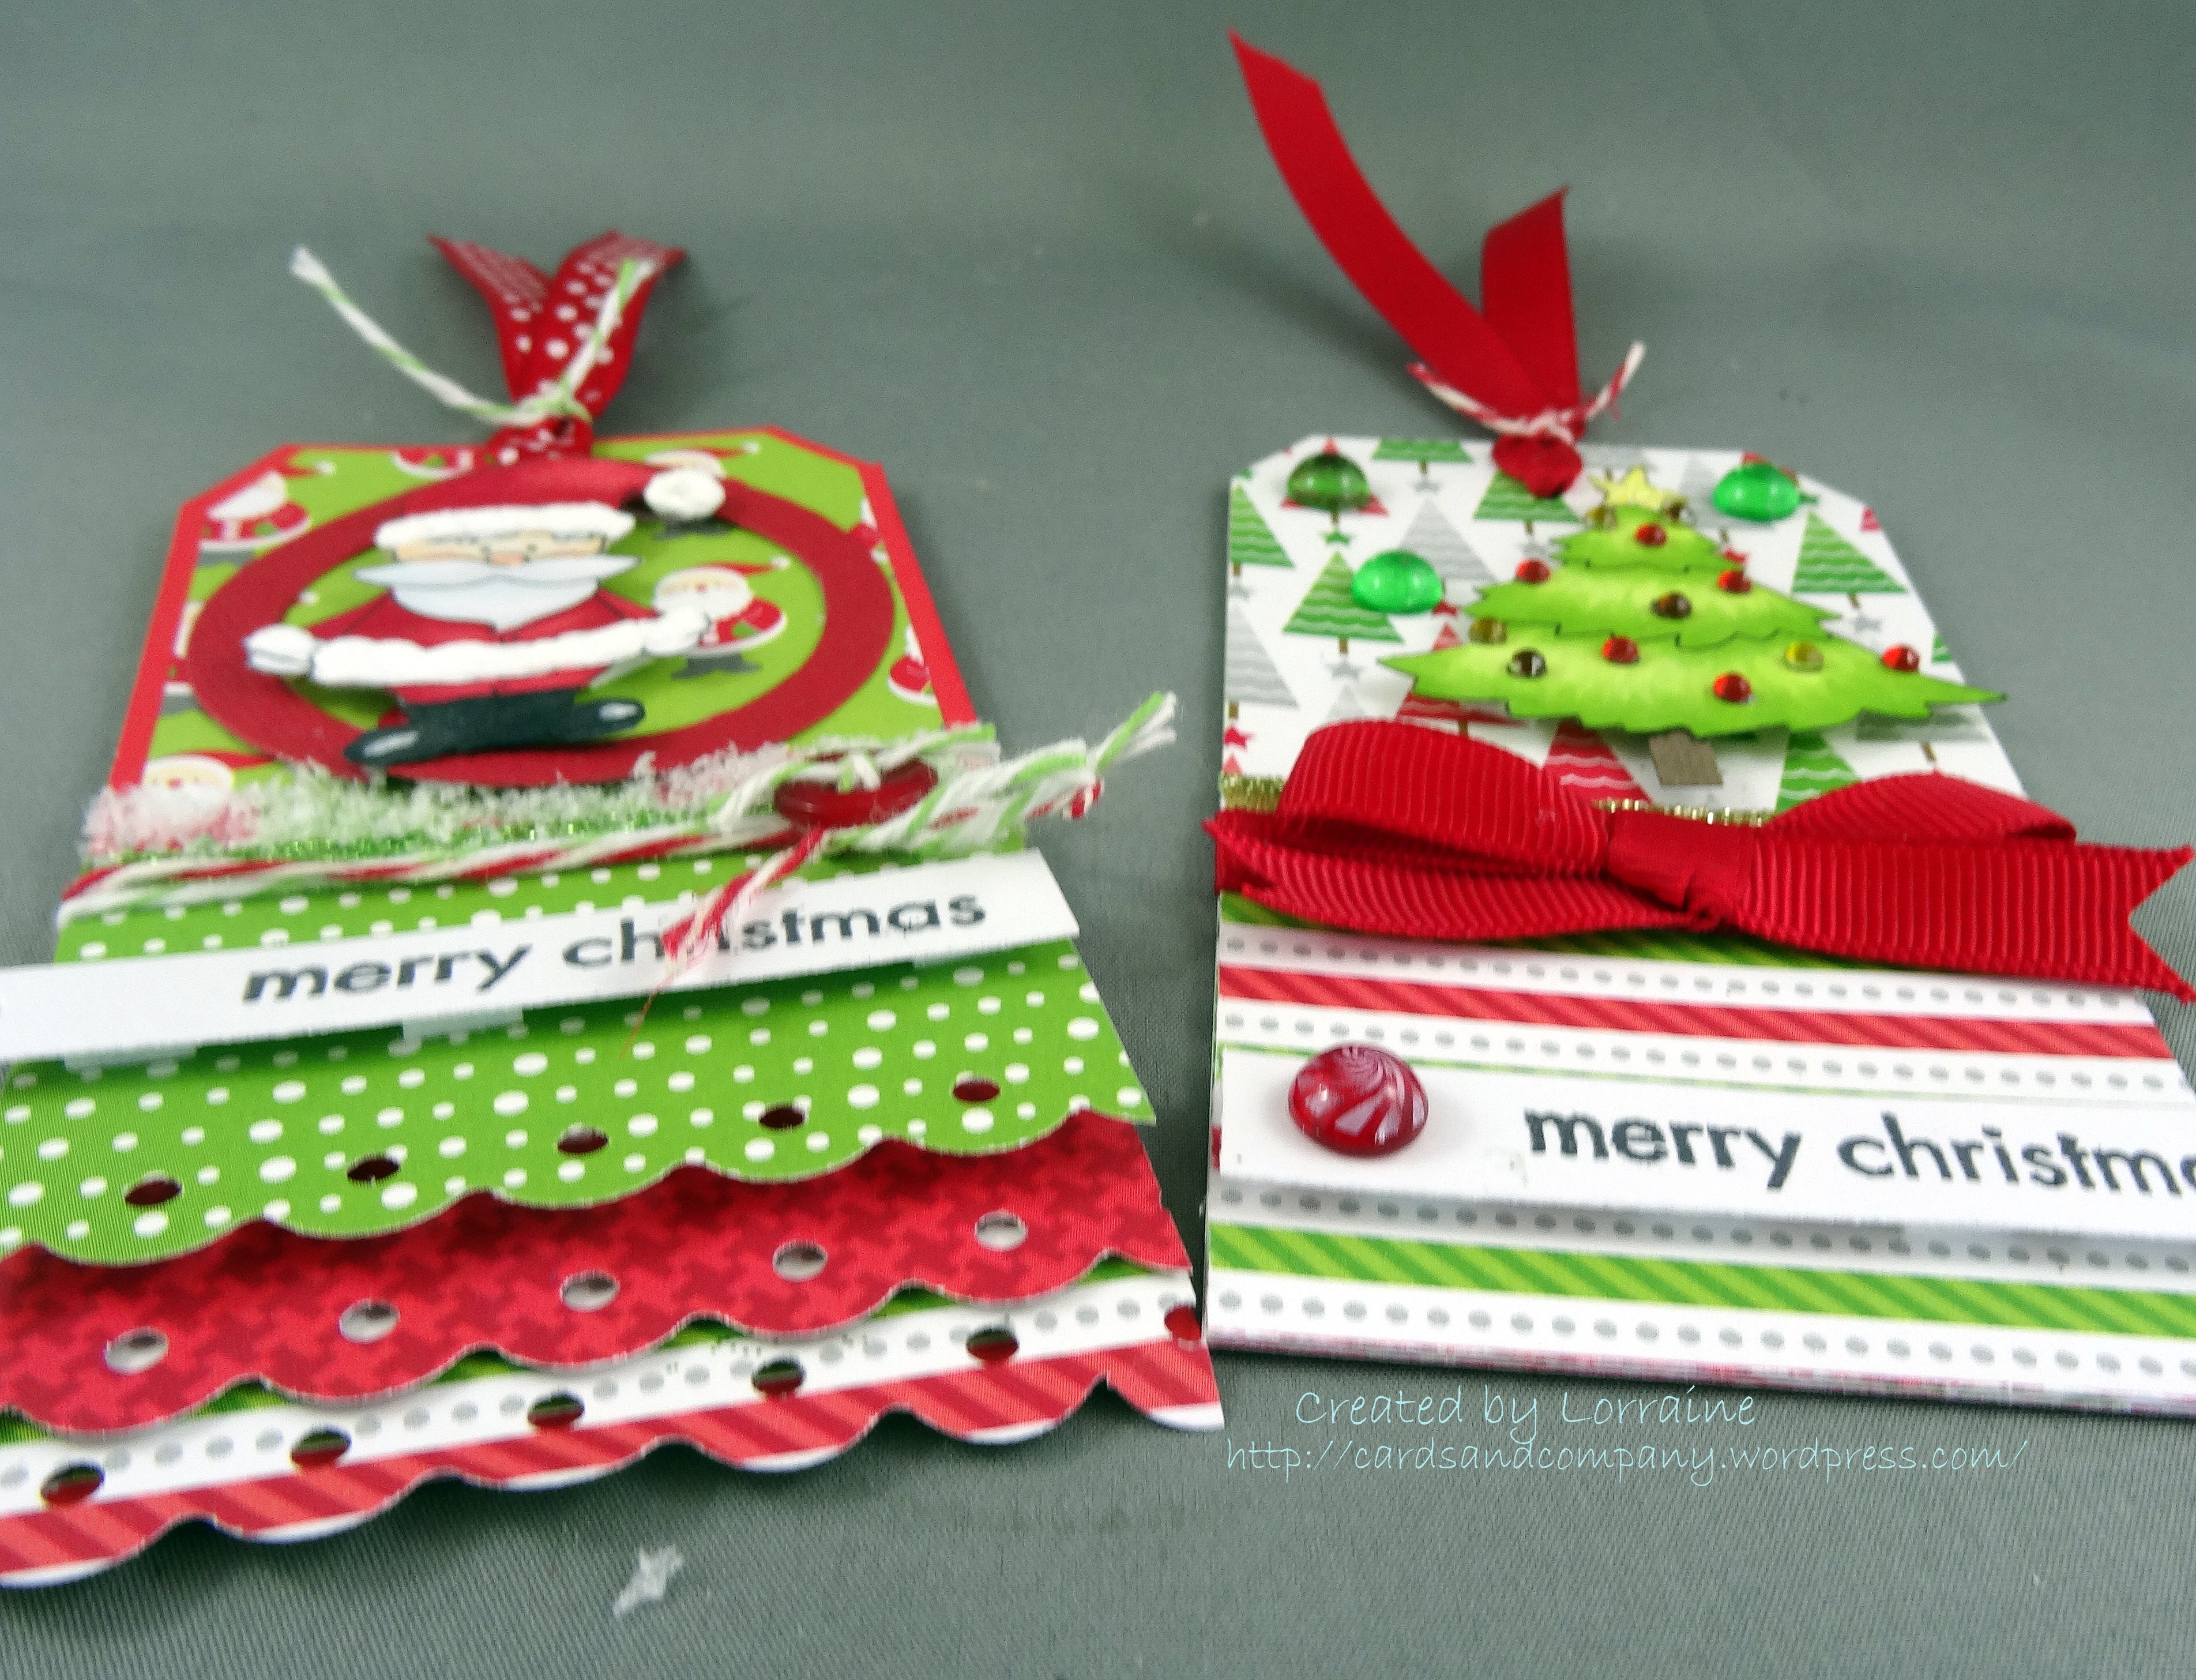
Our next “Crafty Get-together” has come around quickly, it is this Saturday 9th November, 1 – 4 pm. I have already shown you two projects, well here is the third, 2 Christmas tags –
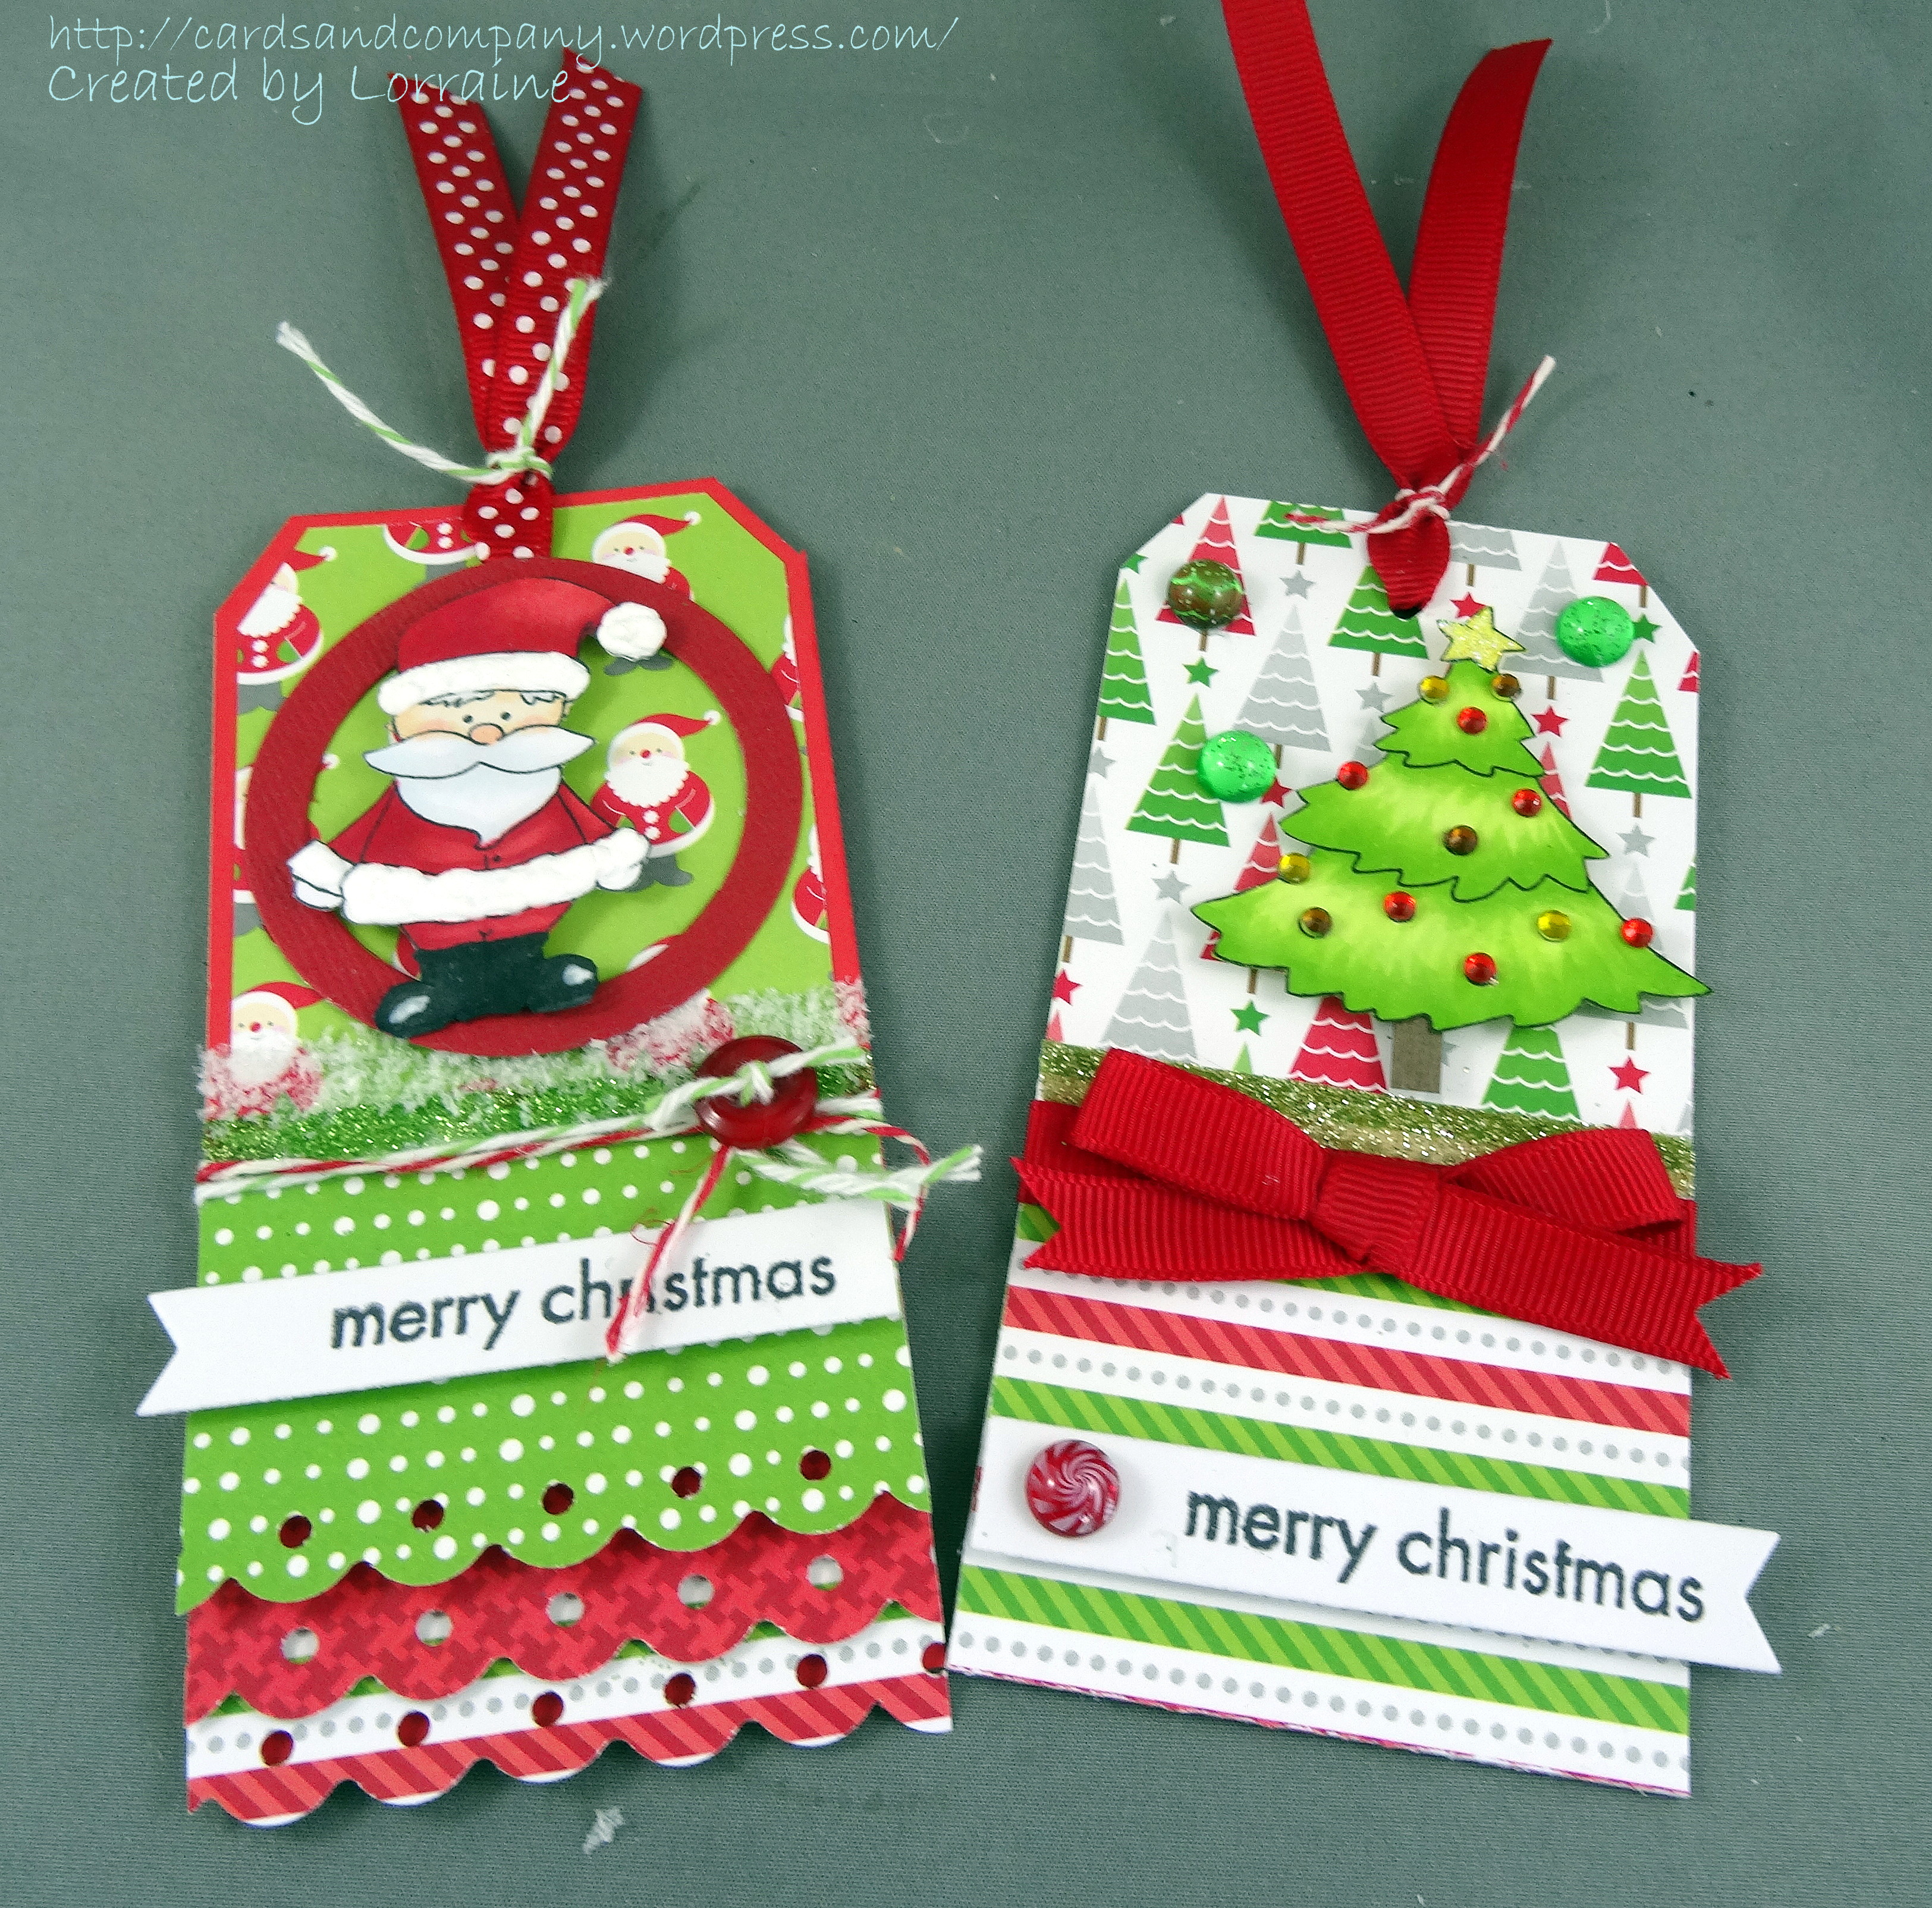
Tried to get a photo to show you the layers and dimension –
Better get back to making the kits.
Bye for now,
It is one of my grandson’s 4th birthday and I love to make my birthday cards, but little boys’ cards stump me sometimes. While I was in our local scrapbooking store, the Imagination Factory, recently I saw a great card by the owner, Tracey. I thought I would CASE the card. I looked on-line to find out exactly what “casing” a card actually involved. Here is a small selection of what I found –
- copy and share with everyone
- copy and steal everything
- copy and selectively edit (change 3 things seemed to be a common suggestion)
- copy and stamp exactly.
I am hoping that “Tracey” agrees that it is the 3rd option “copy and selectively edit”. I used a different digital stamp, different sentiment, skewed the focal image and didn’t add the twine and strip of paper down the centre. The papers and stars are the same and the sketch almost the same.


The digital stamps is from Some Odd Girl “Pumpkin Kody”. The papers are from a pad from My Mind’s Eye “Sunshine”. The sentiment is from Verve.
Because his birthday is very close to Halloween that was the theme for his party (hence the pumpkin in the stamp). Here are some family photos from the party.

The pirate family – Jack Pirate (not Sparrow), Mummy Pirate and Skelton Pirate.

Blowing out the candles can be tricky even for a Skelton.

Sometimes you just need some encouragement from a friend.
Great party!
Bye for now,
Our family lunch this time had the theme of Halloween. I found a lot of photos and recipes for Halloween on the web especially Pinterest and of course I had to try some. We were first time Halloweenians 🙂 so we were a bit excited to try the food. Here are my photos –


I’ve put a little clip on YouTube from our day. Grandma was showing the grandies a magic drink (well not so magic but to under 4 year olds it was amazing) 😆 It was just ice cream added to fizzy raspberry drink. Grandma must have looked very “dodgy” dressed as Morticia Addams (I had taken off the wig by then) because the eldest was very wary of this magic and wanted me to take a drink before he was willing to take a sip – wonderful. The 2 littlies were quite keen but were warned by their big brother/cousin. he he he
We had fun!
Bye for now,
Well I had a lovely day on Saturday meeting up with school friends. Needless to say there was lots of talking and laughter. We all bought along photos of our families – so great to see. It was so comfortable it really felt as if we could just pick up where we left off all those years ago. Don’t know why we hadn’t done it so much sooner. Here we are –

When we were about to leave I suggested that we make a date for another get-together, I thought an annual event perhaps, but I was thrilled to hear “not that long”. It didn’t take long to settle on a date – 12th January – we can celebrate the new year as well. Looking forward to it.
Thank you to all for such a lovely day. The only down side to the day was that the restaurant closed at 3 o’clock because they had a wedding to prepare for that evening. Curtailed our chatting severely 😦 but we will make sure that doesn’t happen again :lol:. Thank you Judith for taking on the job of sourcing the next venue.
Bye for now,
Hello everyone. I have been busy making some little “Easel Card / Drawer” gifts for 6 women who haven’t seen each other as a group for about 35 years – gasp :O:
We were the form of 5C1. Yes there were only 7 girls in the form, a very small group that year. A couple of us had kept in touch because our children went to the same school but after our children left school we had lost touch.
Tomorrow we are meeting at a restaurant here in Ballarat which will be lovely. I’m a bit excited. Here are the 6 little gifts which I have JUST finished – talk about leaving it almost to the last-minute.

The next photo is of 3 of the card/drawers standing up as easel cards.


The next photo shows the drawer open with the goodies inside. As well as the chocolates I will include a small photo from our school days and a form we can all fill in with our phone nos. email, etc. so we can keep in touch.

Finally these photos show you the card folded down and a pretty bow added to keep it neat for gift giving.


Phew I’m glad I finished these in time for our reunion.
Bye for now,
Welcome, today I have made a Christmas stocking tag. We will be making these “gift tag holders” at our next crafty day.

Gift tags are such popular gifts now but you could also just as easily add some money
The paper is from a paper pad by “Carta Bella” called “Winter Fun”.

Bye for now,
We’re having another “crafty get-together” soon and everyone seemed keen to make some Christmas themed projects. Yes I know – it seems like we have just got over last Christmas but it just a little over 2 months until the 25th.
This is a sneak peek at the first little project I have in mind –


Let’s just hope we can find a date which will suit everyone. It is getting to that time of the year when everyone starts to have full diaries.
Bye for now,